Translator Revolution DropDown WordPress Plugin
Reach millions of people around the world with just a simple couple of clicks
Installation
One minute installation guide
This video uses the simplest configuration. The plugin can be placed anywhere using the advanced positioning settings.
Installation steps
- Unzip the downloaded file package on your local machine.
- Install the plugin, automatic way (as shown on the above video):
- On the WordPress admin tool, go to Plugins > Add New > Upload.
- Choose the
wp-translator-revolution-dropdown.zipfile, and click Install Now. - Provide the FTP credentials if you're asked.
- Return to the plugins page and activate the plugin.
- A new option named Auto Translation will appear in the main menu, click it.
- Enter the Item Purchase Code and change the settings at will.
-
Install the plugin, manual way:
- Unzip the
wp-translator-revolution-dropdown.zipfile. - Upload the whole
wp-translator-revolution-dropdownfolder to the server to the/wp-content/plugins/folder. - Go to the Plugins page and activate the plugin.
- A new option named Auto Translation will appear in the main menu, click it.
- Enter the Item Purchase Code and change the settings at will.
- Unzip the
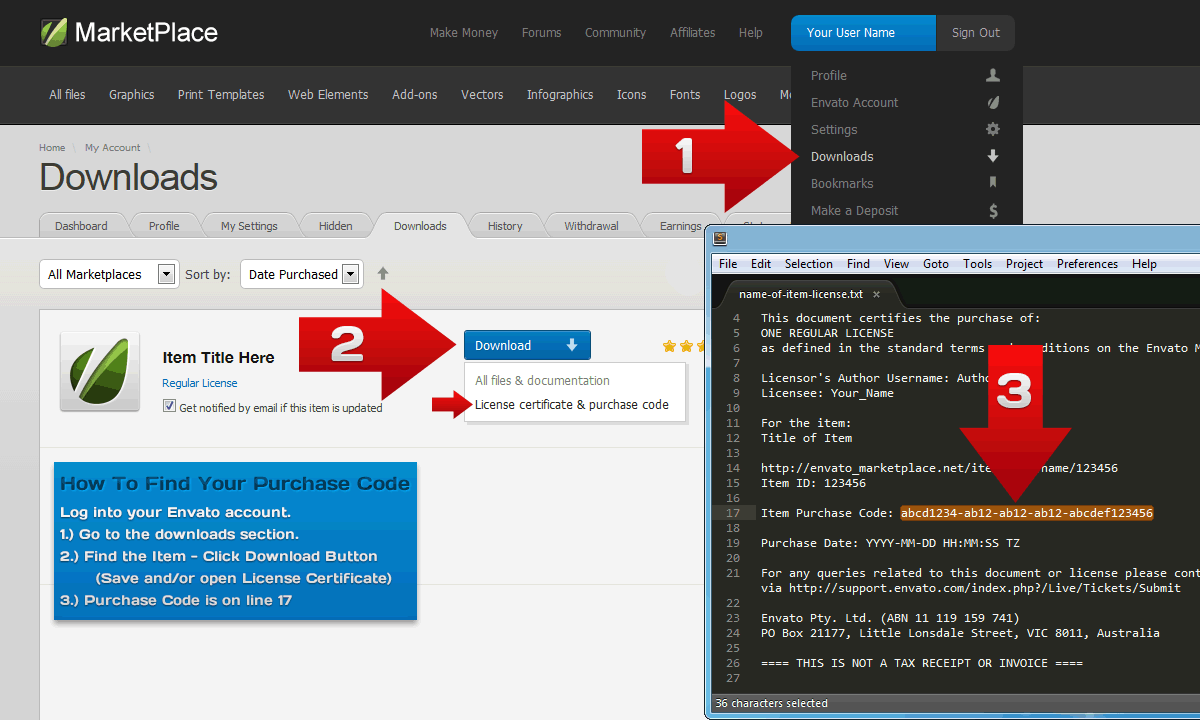
Getting the Item Purchase Code
The Item Purchase Code should be entered directly into the plugin's admin panel. In order to get the code, follow the steps: